Skip to content


Guide for the installation of your Namastay Blinds
Installing your new blinds is simple and accessible to anyone, regardless of your DIY experience.
With our comprehensive guide, you’ll become an expert in blind installation without the need for a professional and their costs.
FOR THE INSTALLATION
First, you'll need...
A pencil
A measuring tape
One level
A drill
A screwdriver
INSTALLATION
VIDEO GUIDE
Are you more of a visual person? We have created an explanatory video with all the steps that you can find below.
You can also download our guide to print at home.
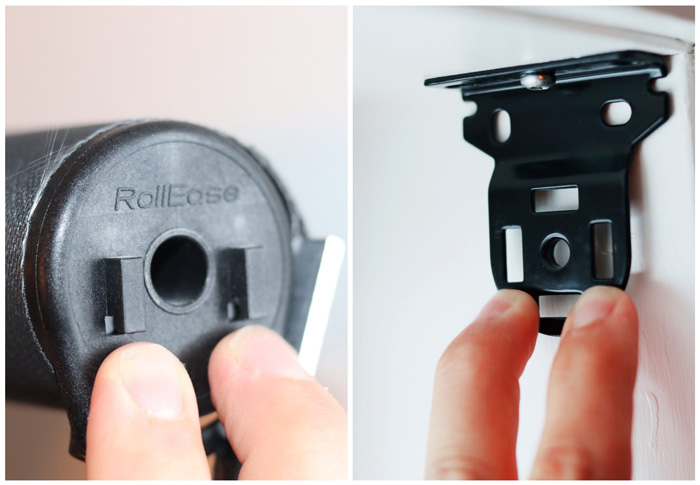
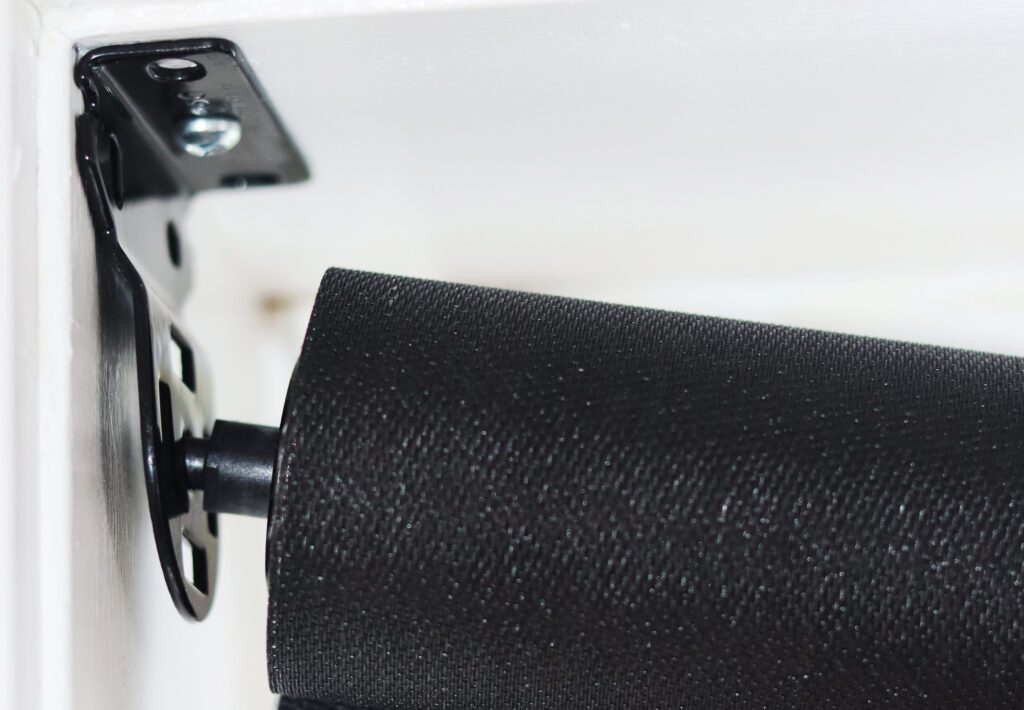
1. The installation of the supports
- Determine the side of the chain system.
- Level the supports. Very important to avoid crooked winding.
- Attach the brackets to either the window frame, wall or ceiling as shown below.
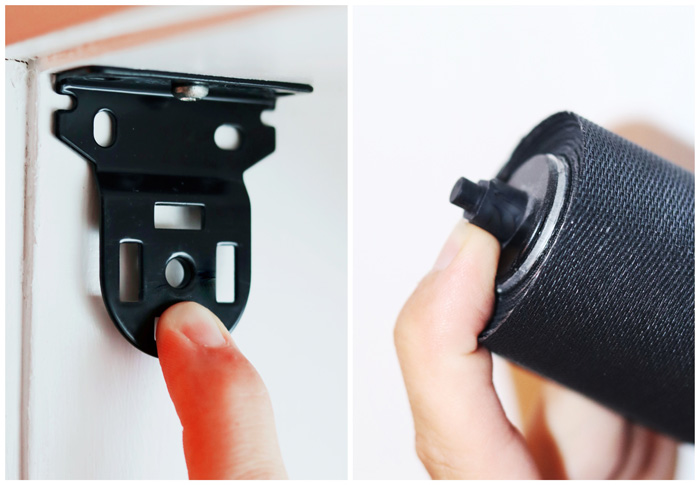
2. The installation of the canvas
- Insert the spring-loaded tip into the holder with only one hole in the center.
- Insert the two hooks at the end of the chain system into the two rectangular holes in the bracket and pull down.
- The bottom of the chain system must always point downwards. See the illustration below.
How to adjust the winding?
- In case the fabric rolls up to the right, correct the problem by removing the notch attached to the chain.
- Unroll the fabric completely and place a piece of masking tape (more than one piece may be needed) as close as possible to the left end of the roll (see illustration).
- Replace the detent after adjustment.
- In case the fabric rolls to the left, correct the problem by the same procedure as above but put the ribbon on the right side.
AFFORDABLE BLINDS
Best value for money guaranteed
ALWAYS CUSTOMIZED
Our blinds are designed especially for you.
FREE DELIVERY
Yes yes! It's free! At all times.
NEED INFORMATION ABOUT OUR PRODUCTS?
Contact us now. Our team is ready to answer all your questions.